-
Journal: Starting out with Nancy on Mono Pt.3 posted on 16 Dec 2012
In the last blog post, I had some trouble finding an ORM layer I could tolerate. Since then, I have built mono 3.0.3 from source (master/df22423 Sat Dec 15 04:31:04 EST 2012). It wasn't easy - there was a lot of black magic involved. Even once I had the mono compiler and libraries built, I was unable to build Entity Framework from source. My solution was to get the EF5 binary from NuGet - so there wasn't really any point to my building mono from source!
So, if you're here and you want to use EF, don't build it from source. Take the easy way out and download the binary from NuGet! (Not that I want to discourage anyone from contributing to an OSS project, but if you're reading this, you're probably more interested in Nancy & WebDev than ORM guts.)
I was unable to get the MySQL bindings working, so I moved into a Windows 8 VM. From here on out, I'll be using EF5 (possibly moving to EF6) on "LocalDB".
-
Journal: Starting out with Nancy on Mono Pt.2 posted on 15 Dec 2012
Hello world is great, but it's time for some real code. I plan to develop a simple flash-card style application to help me study organic chemistry.
I'll be developing on Debian Testing/Mono with MonoDevelop.
FAIL. Stop reading now, I gave up with Massive and am switching over to EntityFramework. Thus, I am currently building Mono from source.
Setup
I don't like the XML mappings that are used with NHibernate, so I am going to use the excellent "Massive" from Rob Connery. Since I'm using MySQL, I'll be working with Alexander Nyquist's MySQL fork of Massive.
Why Massive?
Tiny and simple, a perfect compliment for our tiny and simple web framework.
First things first, let's fork massive-mysql. I put it into a separate project; you don't have to. Whichever route you choose, you'll have to add some references to your project.
In the project that contains your Massive.*.cs file:
- Install mysql.data from NuGet
- Add references to:
- Microsoft.CSharp
- System.Configuration
- System.Core
- System.Data
- System.Data.Linq
- System.Dynamic
Let's check that everything compiles and move on to some code.

My project after adding references
ORM
The first code I'll write is the ORM code. To prepare, I have drawn a rough diagram of the tables the app will need.
-
Journal: Starting out with Nancy on Mono Pt.1 posted on 12 Dec 2012
Before starting out, I installed NuGet, per these combined instructions:
http://monomvc.wordpress.com/2012/03/06/nuget-on-mono/
http://grhughes.com/32/using-nuget-in-mono
http://nuget.codeplex.com/workitem/1271Special note on the last item there. I had to put Microsoft.Build.dll into the same directory as NuGet.exe before it would run. (Was failing for 'Could not load type 'NuGet.Commands.ProjectFactory')
Now that I was ready to move on to some code, I created a new C# ASP.NET project in MonoDevelop. I'm using MonoDevelop 3.0.5 that I built from source, but all other versions should have this option.
I downloaded the latest Nancy build from their CI server here: http://teamcity.codebetter.com/project.html?projectId=project112&tab=projectOverview&guest=true
Added references to Nancy.dll and Nancy.Hosting.Aspnet.dll in MonoDevelop.
On the Nancy wiki's into page, there is a Hello World snippet. Before running it, a web.config file must be created.
I found the default configuration here: https://github.com/NancyFx/Nancy/wiki/Hosting-nancy-with-asp.net
<configuration>
  <system.web>
    <compilation debug="true" targetFramework="4.0" />
    <httpHandlers>
      <add verb="*" type="Nancy.Hosting.Aspnet.NancyHttpRequestHandler" path="*"/>
    </httpHandlers>
  </system.web>

  <system.webServer>
    <modules runAllManagedModulesForAllRequests="true"/>
    <validation validateIntegratedModeConfiguration="false"/>
    <handlers>
      <add name="Nancy" verb="*" type="Nancy.Hosting.Aspnet.NancyHttpRequestHandler" path="*"/>
    </handlers>
  </system.webServer>
</configuration>
Pressed Start program without debugging and watched magic happen!
-
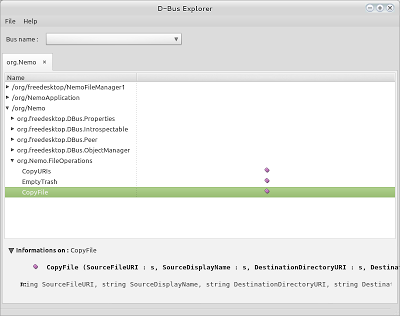
Building DBus Explorer on LMDE posted on 11 Dec 2012
Nice easy build today. DBus Explorer is a handy C# application for probing DBus.
DBus Explorer is developed on GitHub: https://github.com/garuma/dbus-explorer
DBus Explorer relies on DBus-Sharp-GLib, which relies on DBus-Sharp, so all three will need to be built.
git clone https://github.com/mono/dbus-sharp.git
git clone https://github.com/mono/dbus-sharp-glib.git
git clone https://github.com/garuma/dbus-explorer.git
Build and install DBus-Sharp. Expect a few warnings, but it should compile successfully.
cd dbus-sharp
./autogen.sh
make
sudo make install
Build and install DBus-Sharp-GLib. I was able to compile this library without errors.
cd ../dbus-sharp-glib
./autogen.sh
make
sudo make install
Build DBus Explorer
cd ../dbus-explorer
./autogen.sh
make
If you just want to run DBus Explorer, you can launch it from the terminal right now.
mono --runtime=v4.0 src/bin/Debug/DBusExplorer.exeIf you want a shortcut, two more steps must be performed.
Open src/bin/Debug/dbus-explorer in a text editor and change exec mono to exec mono --runtime=v4.0
The modified file should look like this:
#!/bin/sh

exec mono --runtime=v4.0 "/usr/local/lib/dbus-explorer/DBusExplorer.exe" "$@"
DBus Explorer can now be installed (Run from the dbus-explorer/ directory)
sudo make install -
A New Furnace is Born posted on 29 Nov 2012
I was going to write a post about this, but it's been months and it still hasn't happened, so I'll just post the pictures for now.


-
Building GMediaRender on LMDE posted on 29 Nov 2012
Note: I don't know that this will work for you. It builds fine on my system, but gmediarender --list-outputs shows only "Dummy output module (default)". If you have better luck, let me know!
This is a short tutorial for building GMediaRender on Linux Mint Debian Edition.
I used Henner Zeller's gmrender-resurrect project: he has taken the time to add some great features, for example, volume control and seeking support.
You'll want to grab the source for LibUPNP LibUPNP: http://sourceforge.net/projects/pupnp/files/latest/download
First, extract LibUPNP to an accessible directory
Build it and install the binary to your system directory
cd libupnp-1.6.17
./configure
make
sudo make install
Get the source for gmrender-resurrect
git clone git://github.com/hzeller/gmrender-resurrect.git
cd gmrender-resurrect
Edit configure.in, add "-lm" to CFLAGS (near line 22)
Build and install
./autogen.sh ./configure make sudo make install -
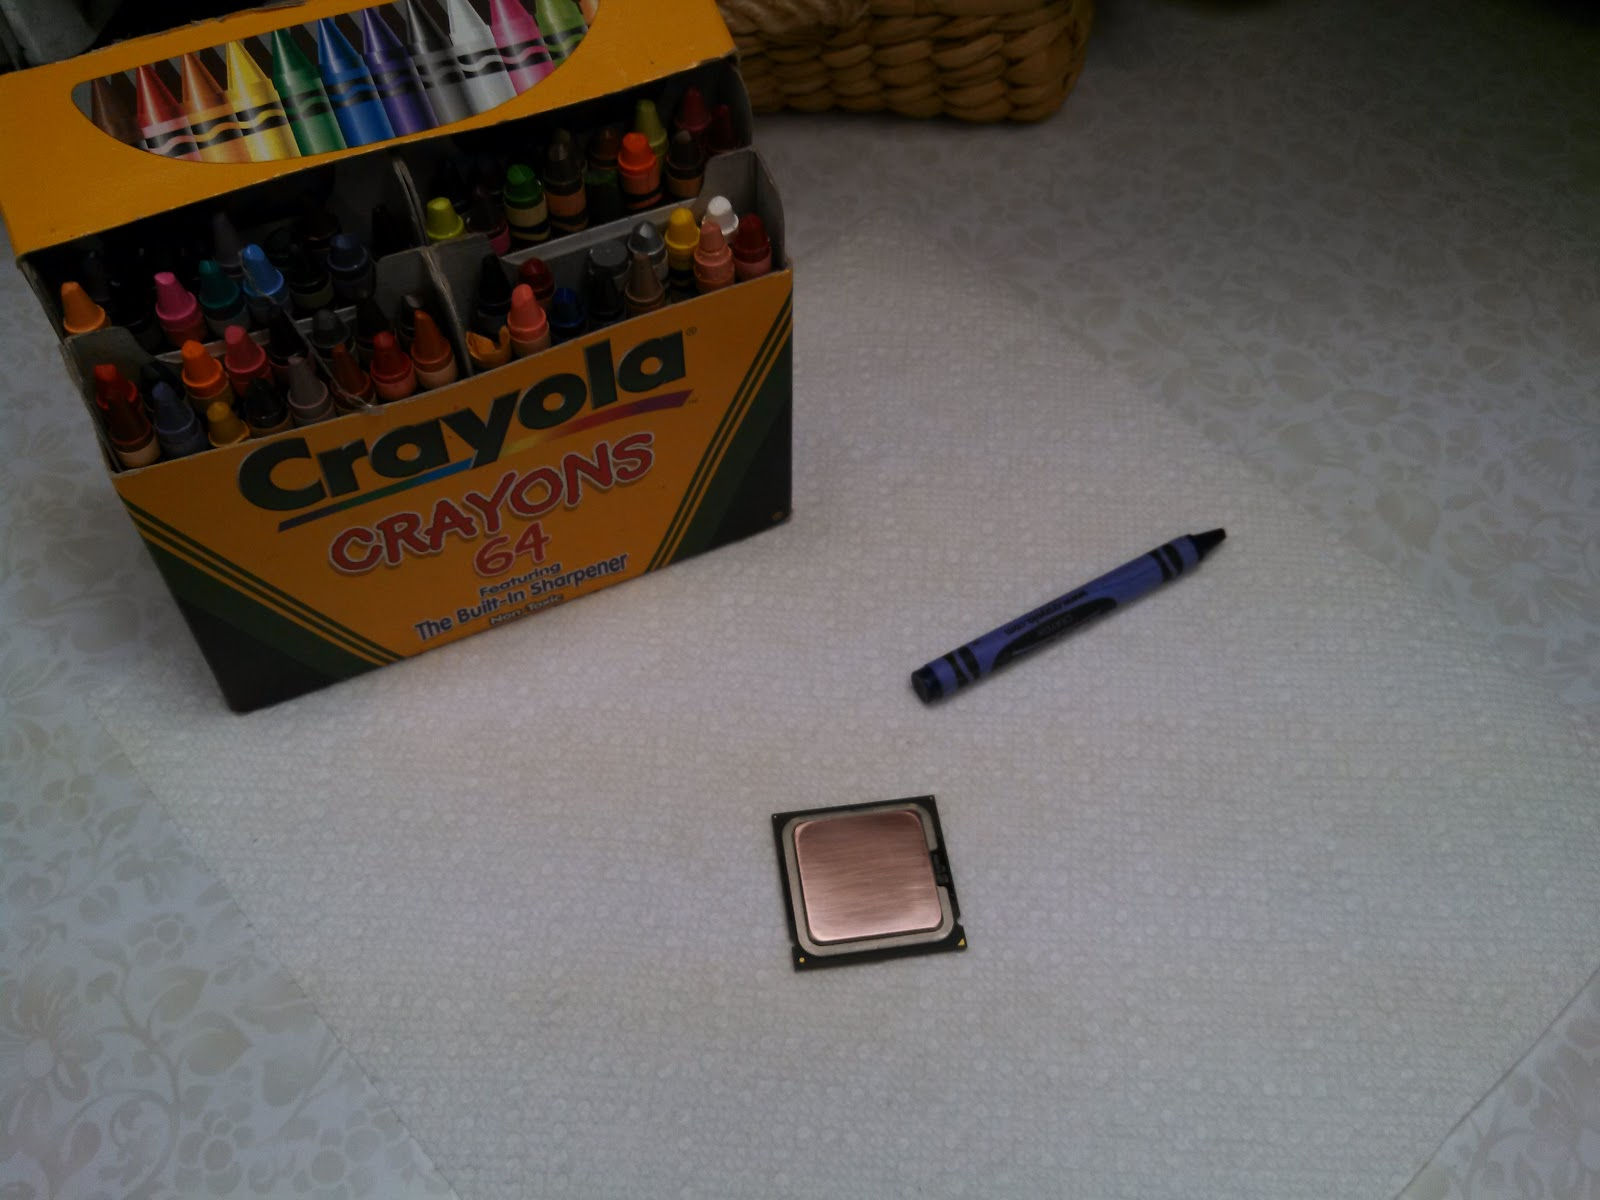
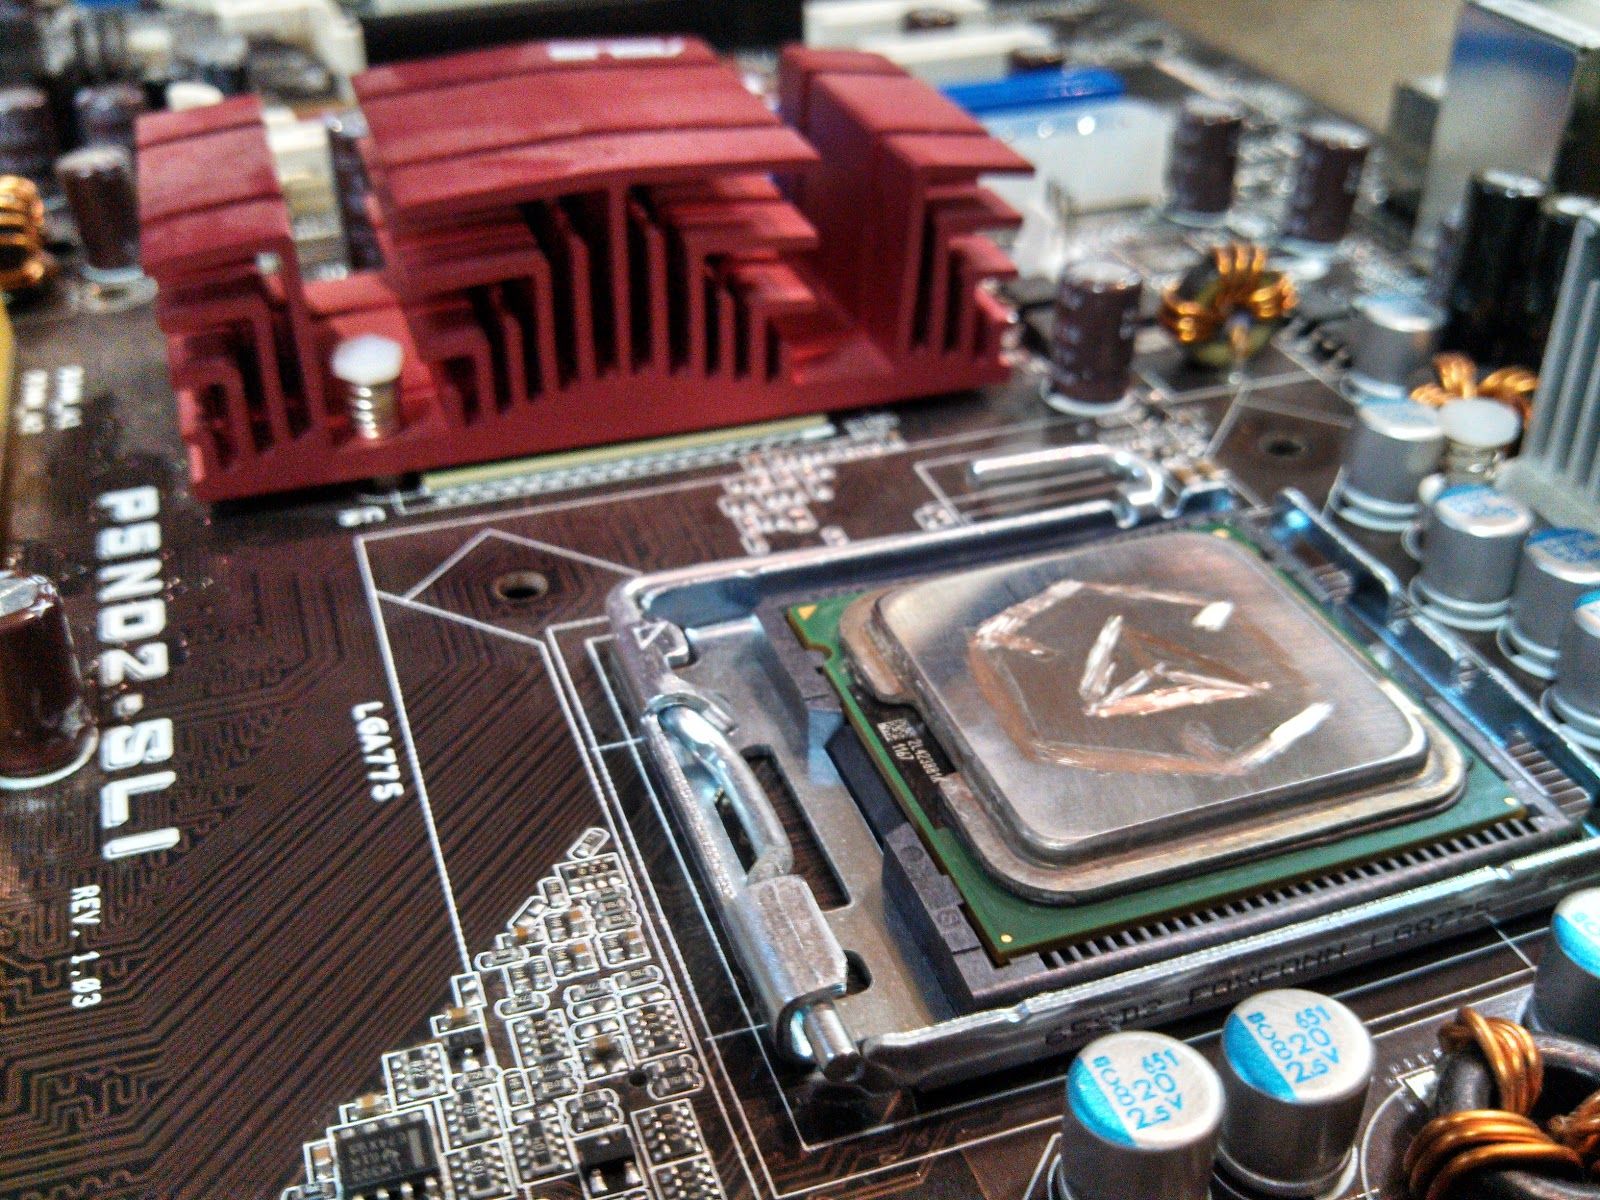
Extemporaneous Project: Ingress Art posted on 20 Nov 2012
Making some original #ingress art
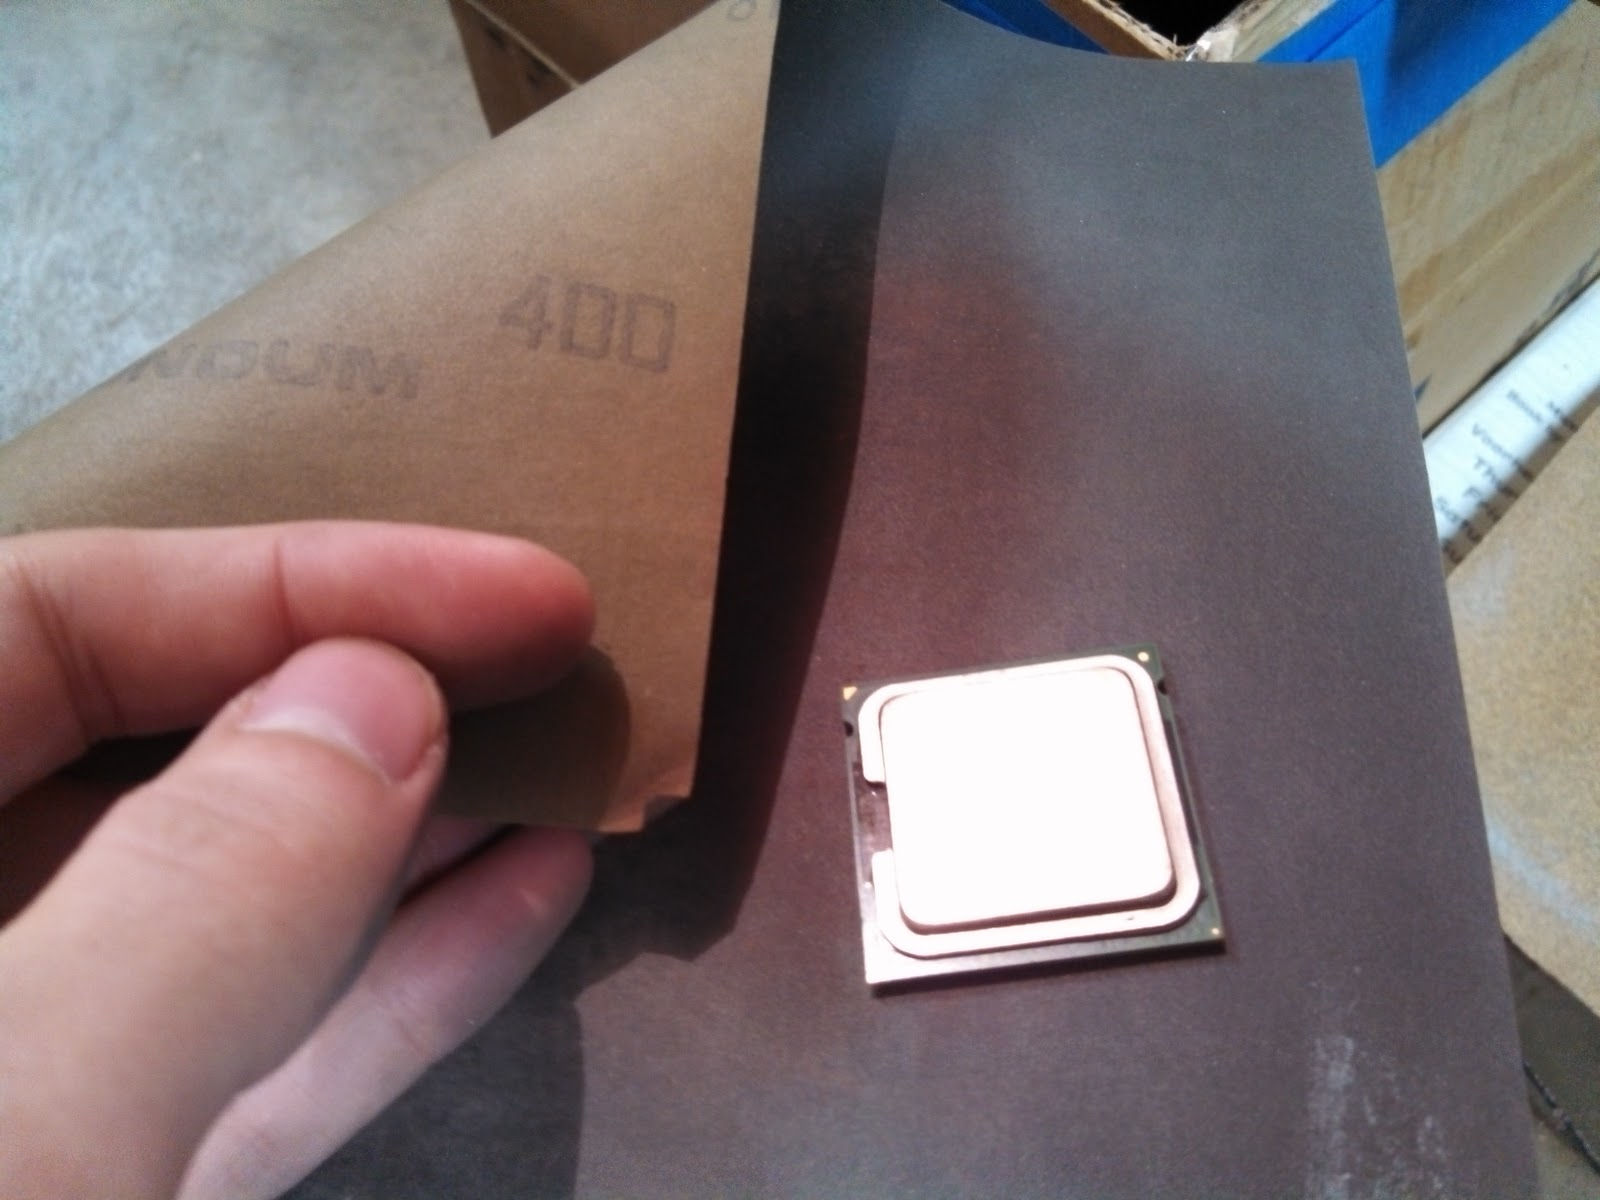
Started out with some fairly rough sand paper.

Fine grit sandpaper and a pane of glass for a shiny finish.

Sanded the heat spreader down to copper.
See where I'm going with this?
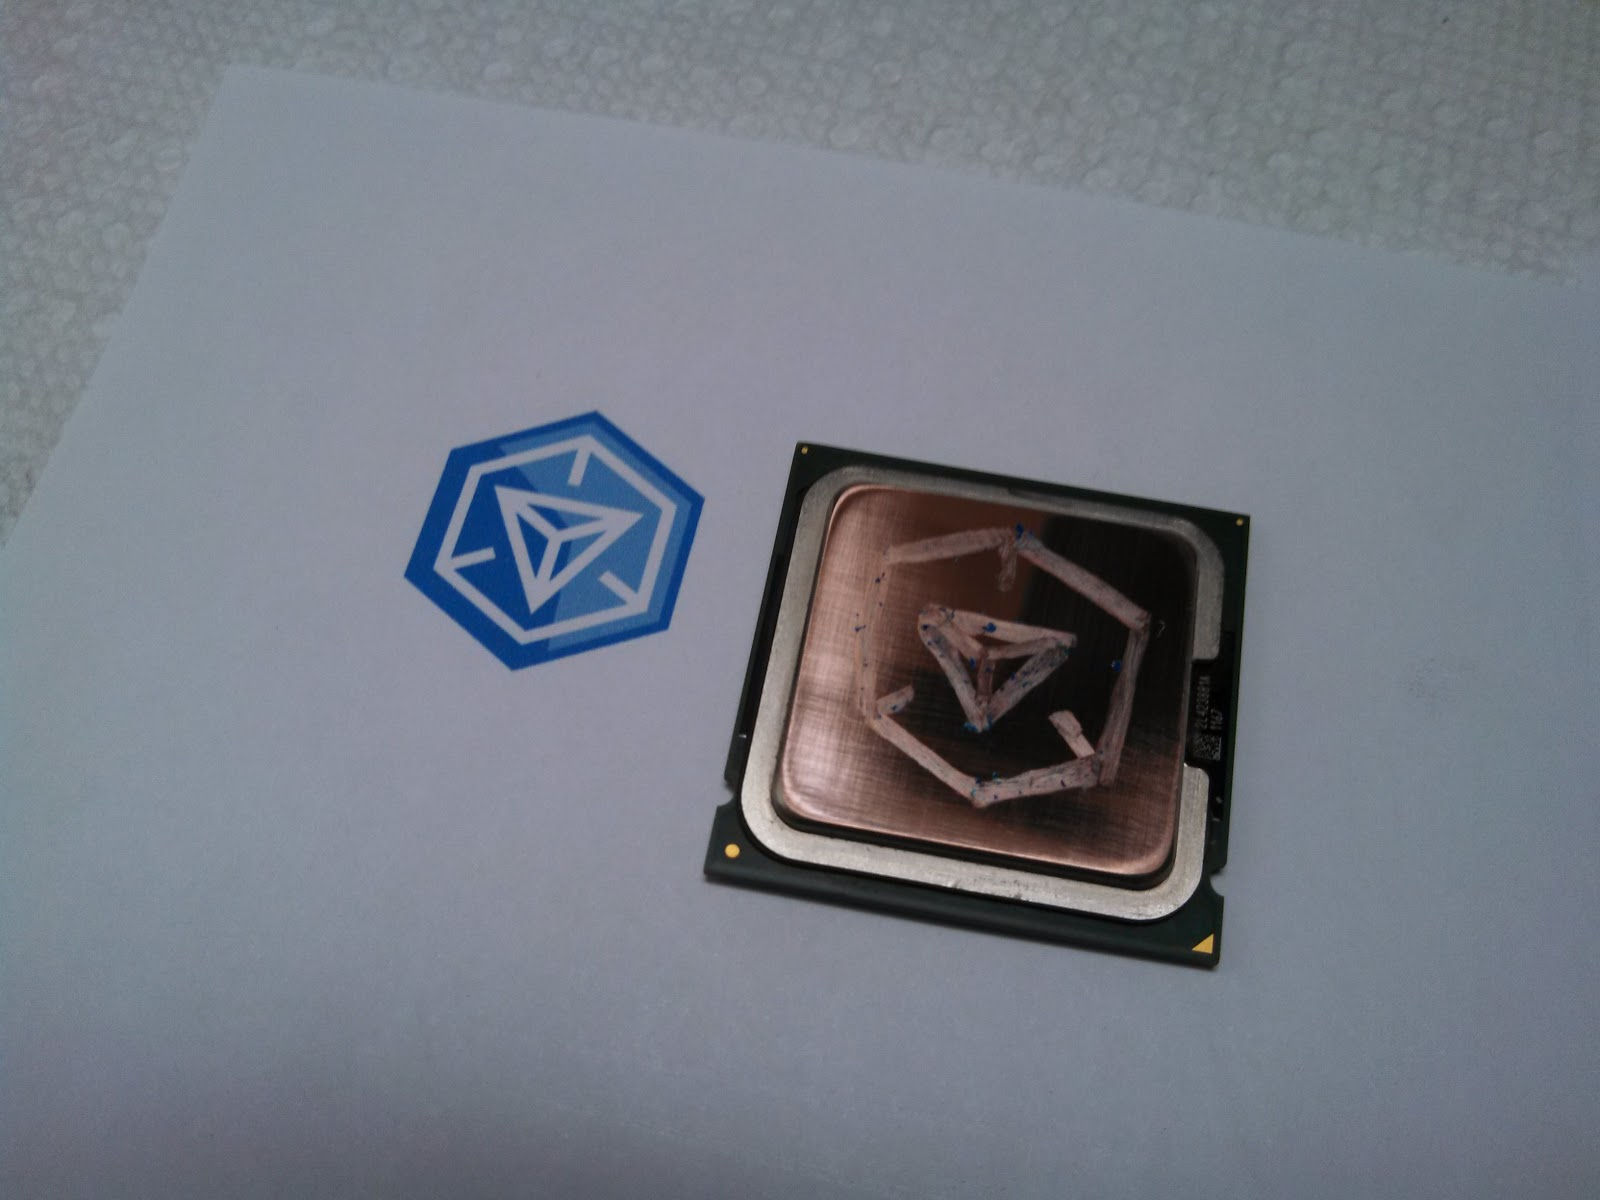
Drew the desired pattern on the processor with a wax crayon.
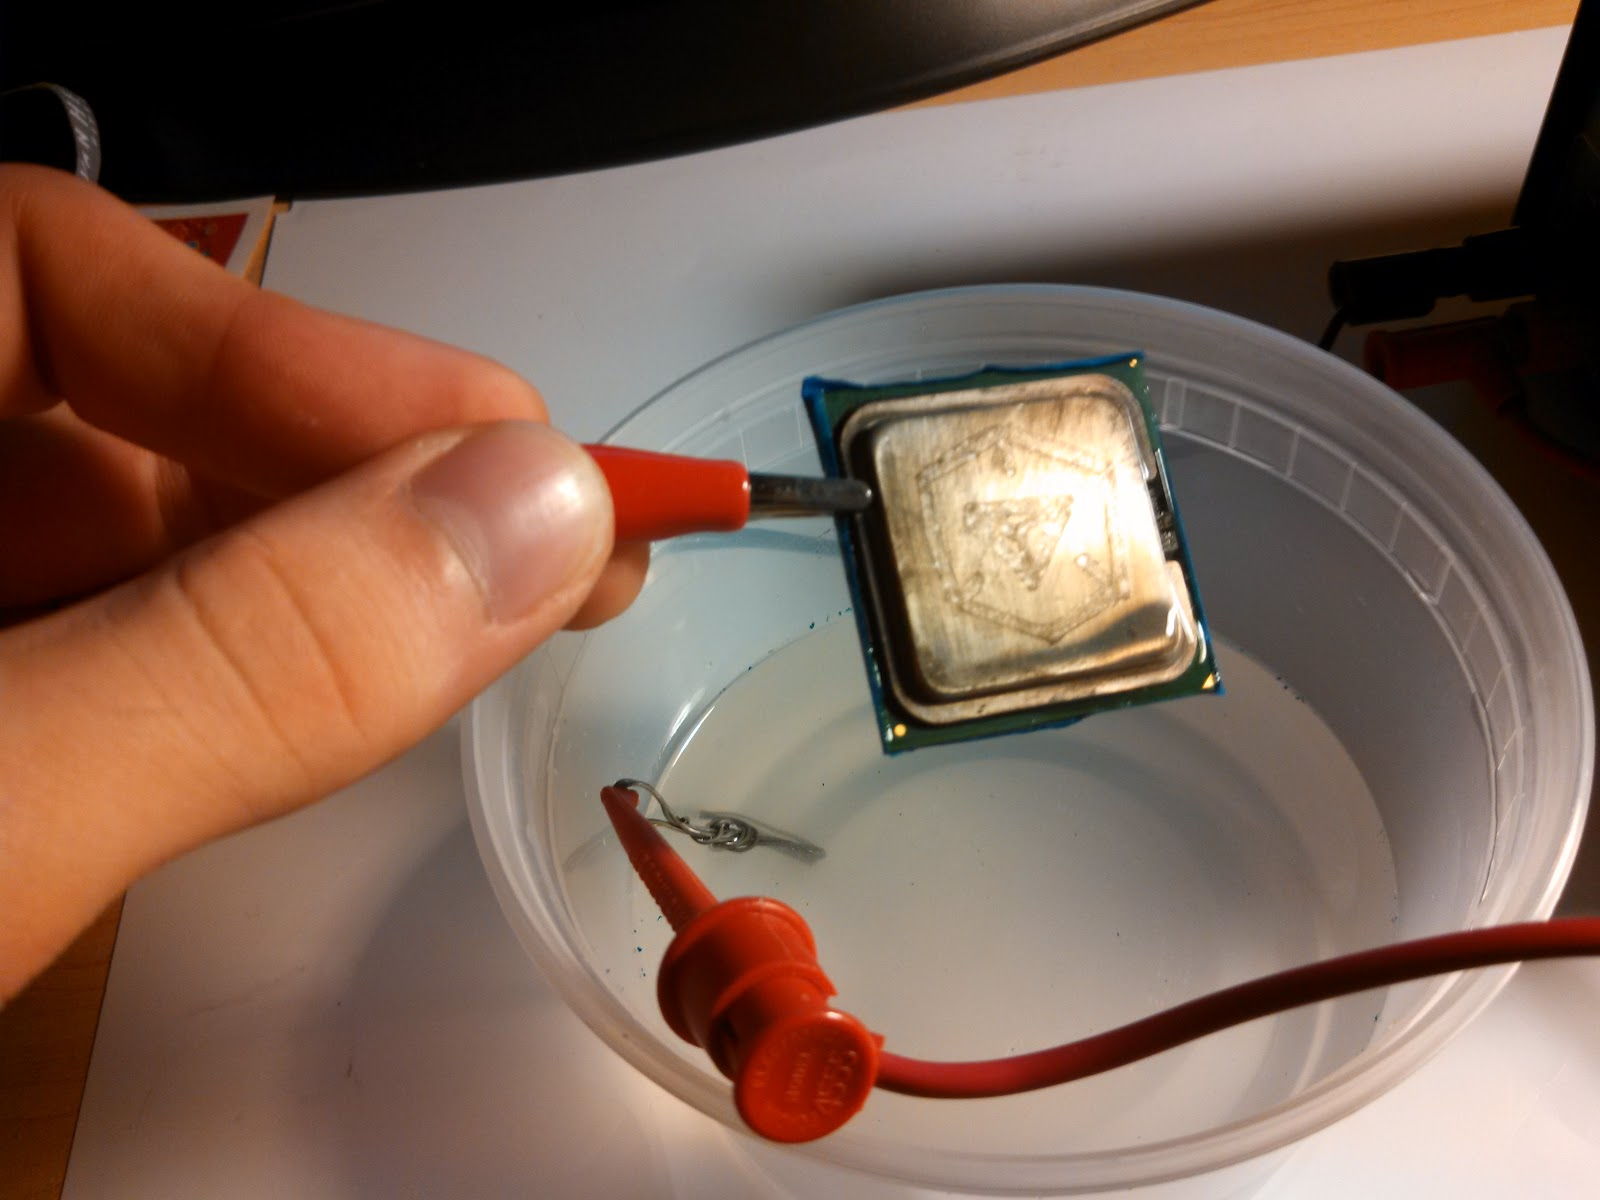
Warning: electroplating with lead solder is probably a really bad idea.
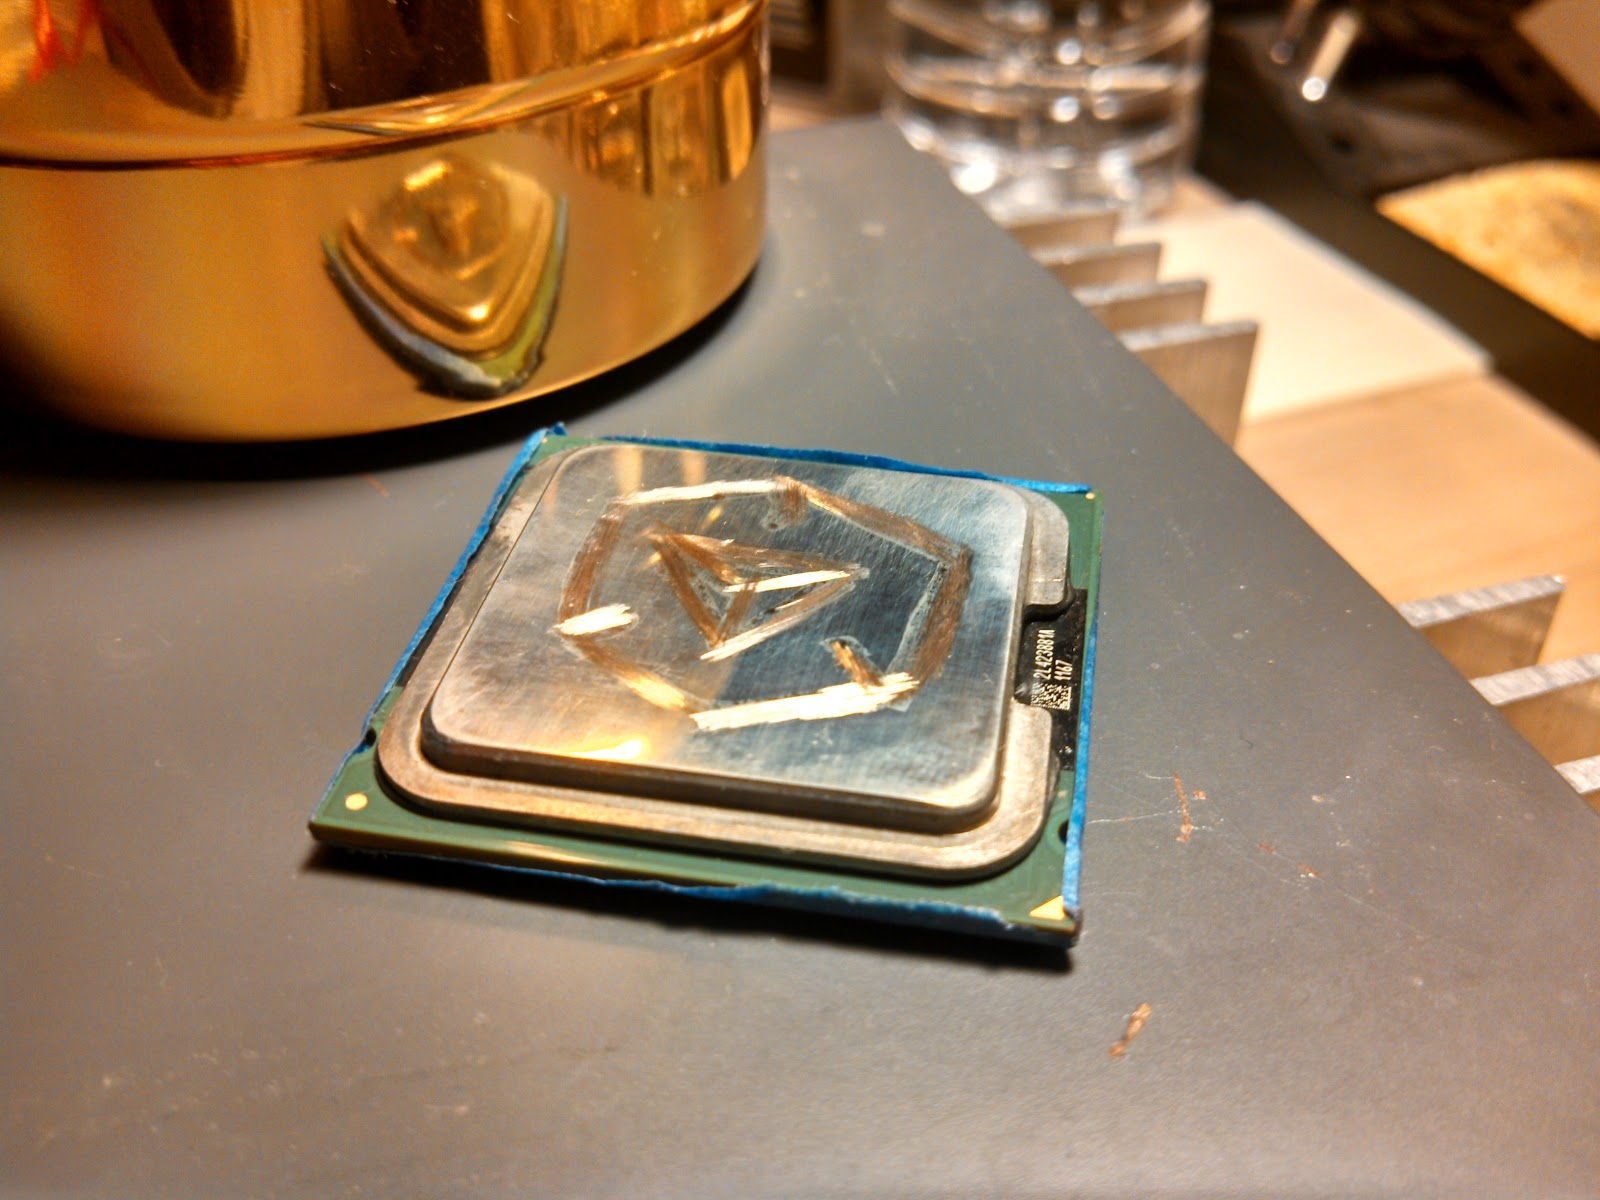
The wax didn't stop the plating well enough, so I made the design stand out with a bit of sanding.
-
Apple 30 Pin Connector Giveaway posted on 19 Nov 2012
I have had these connectors sitting around for months - it's time they move on to a better home! Leave a comment here or catch me on Twitter at @George_Hahn
![][0]
[0]: /images/2012-11-19 20.32.13.jpg
-
Building MonoDevelop on LMDE posted on 19 Nov 2012
I had a fair bit of trouble installing MonoDevelop on my LMDE machine the first time around. As I write this, the current version is 3.0.5 (commit 5542f6c0aa)
Warning: This goes against Mono best practices; if you want do be safe with your system, you should do this in a parallel mono environment. By building on top of your main environment, you risk breaking Mono on your machine. If you want to know more about setting up a parallel environment, read this.
Install some prereqs
sudo apt-get install git autoconf automake mono-devel mono-gmcs libmono-addins-cil-dev libmono-addins-gui-cil-dev libmono-addins-gui0.2-cil libmono-addins-msbuild-cil-dev libmono-addins-msbuild0.2-cil libmono-addins0.2-cil mono-addins-utils libglade2-dev gtk-sharp2 gnome-sharp2Get the source
git clone git://github.com/mono/monodevelop.git
git submodule init
git submodule update
Configure the build - I built main, MonoDevelop.Database and MonoDevelop.Debugger.Gdb; that is, options 1, 4, and 5. Other packages may have prerequisites not outlined here.
./configureBuild the code
makeInstall the built binaries
sudo make install
-
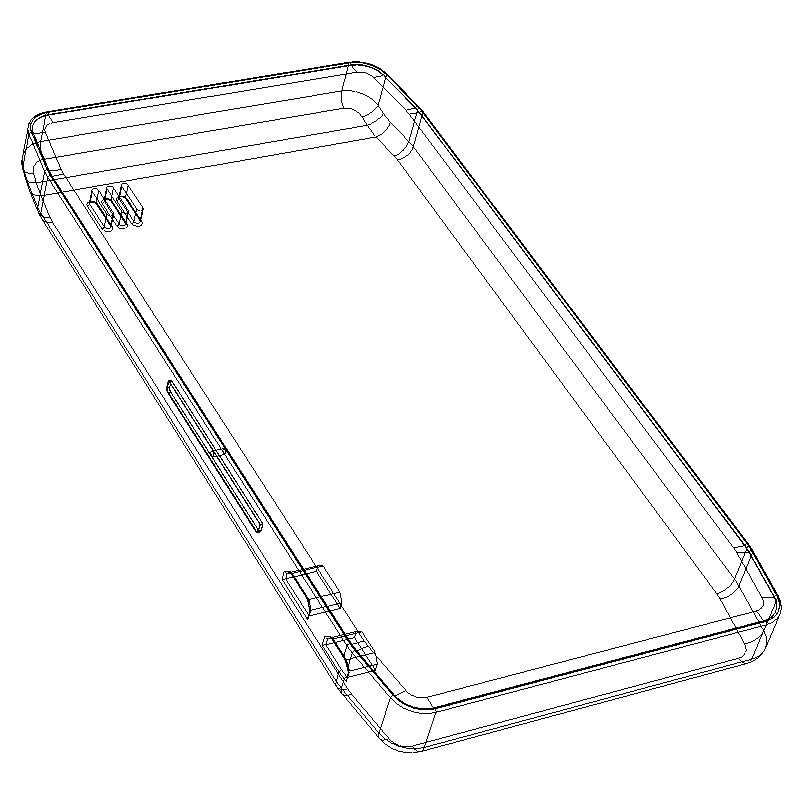
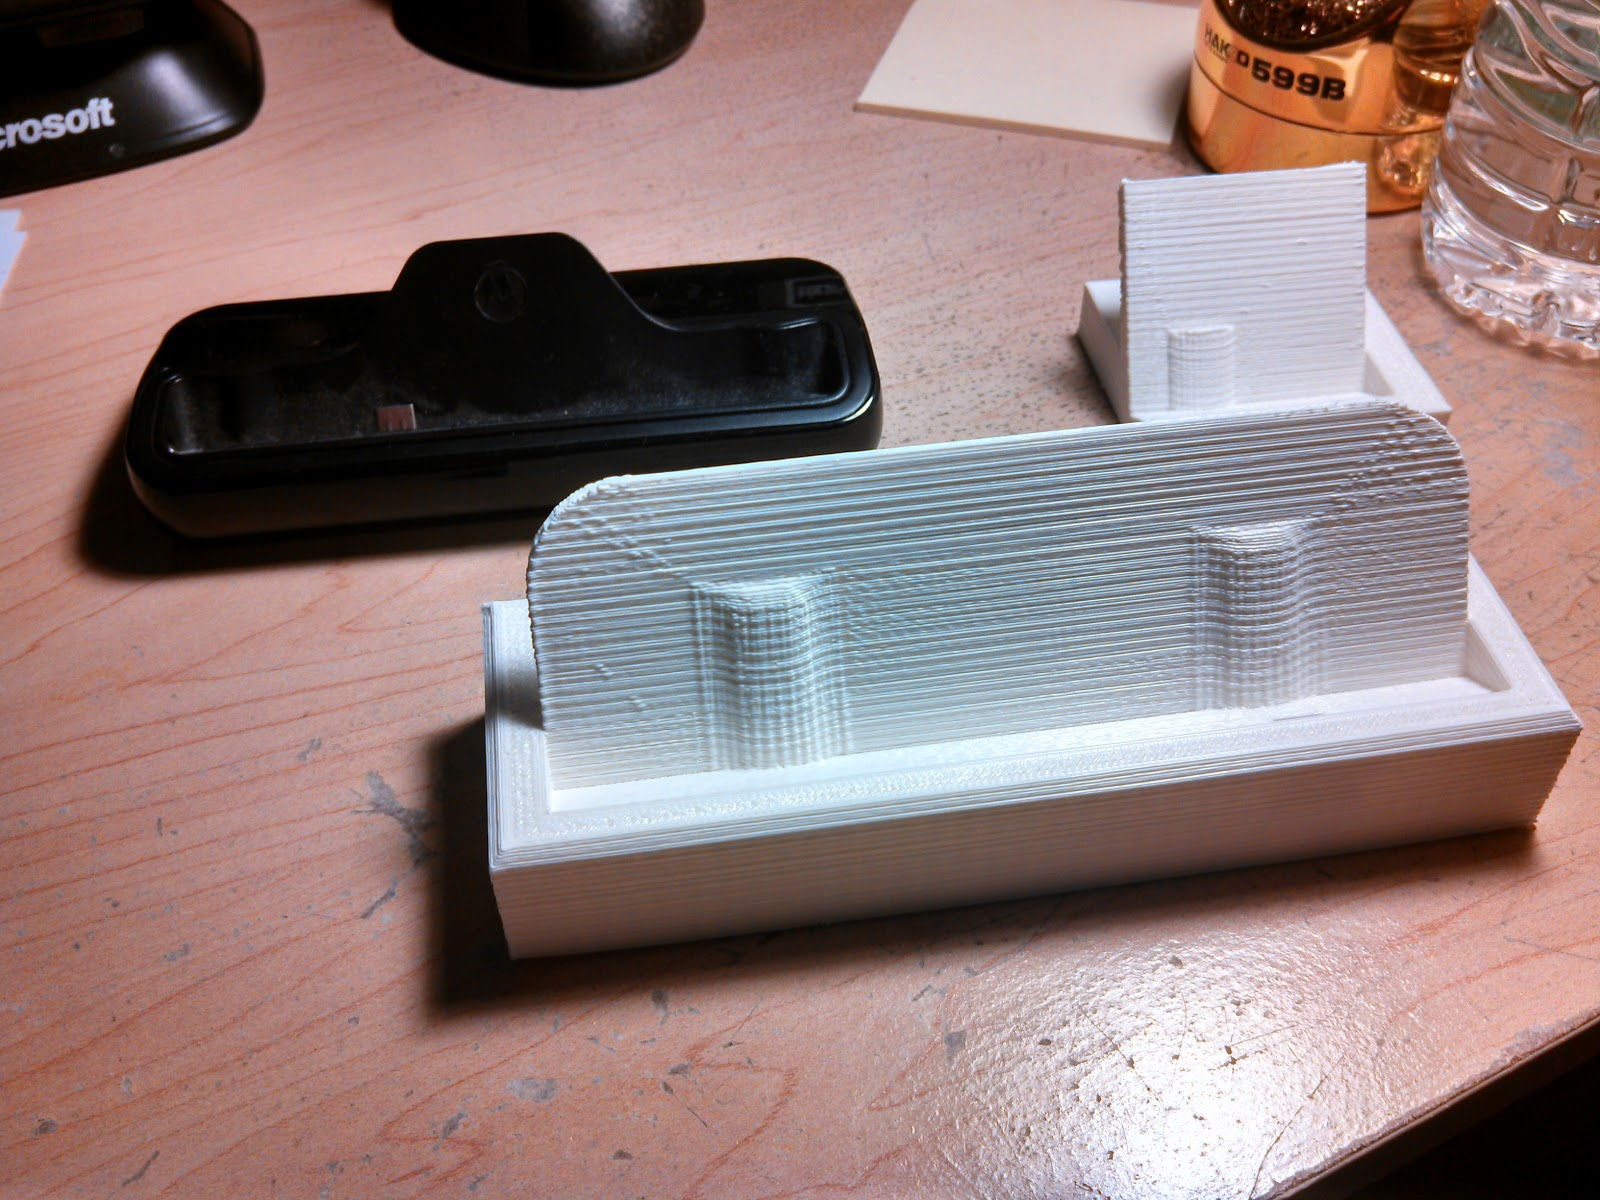
Working on a Droid RAZR HD Maxx Case posted on 17 Nov 2012
Available on Thingiverse: http://www.thingiverse.com/thing:34668
My workflow for this sort of project is to start by designing the part my custom piece needs to fit - so I started by designing my phone.
Once I had a decent model of the phone, I started working on the dock prototype. It didn't take long to realize I would need to print a partial prototype to verify that the micro USB connector fit correctly.
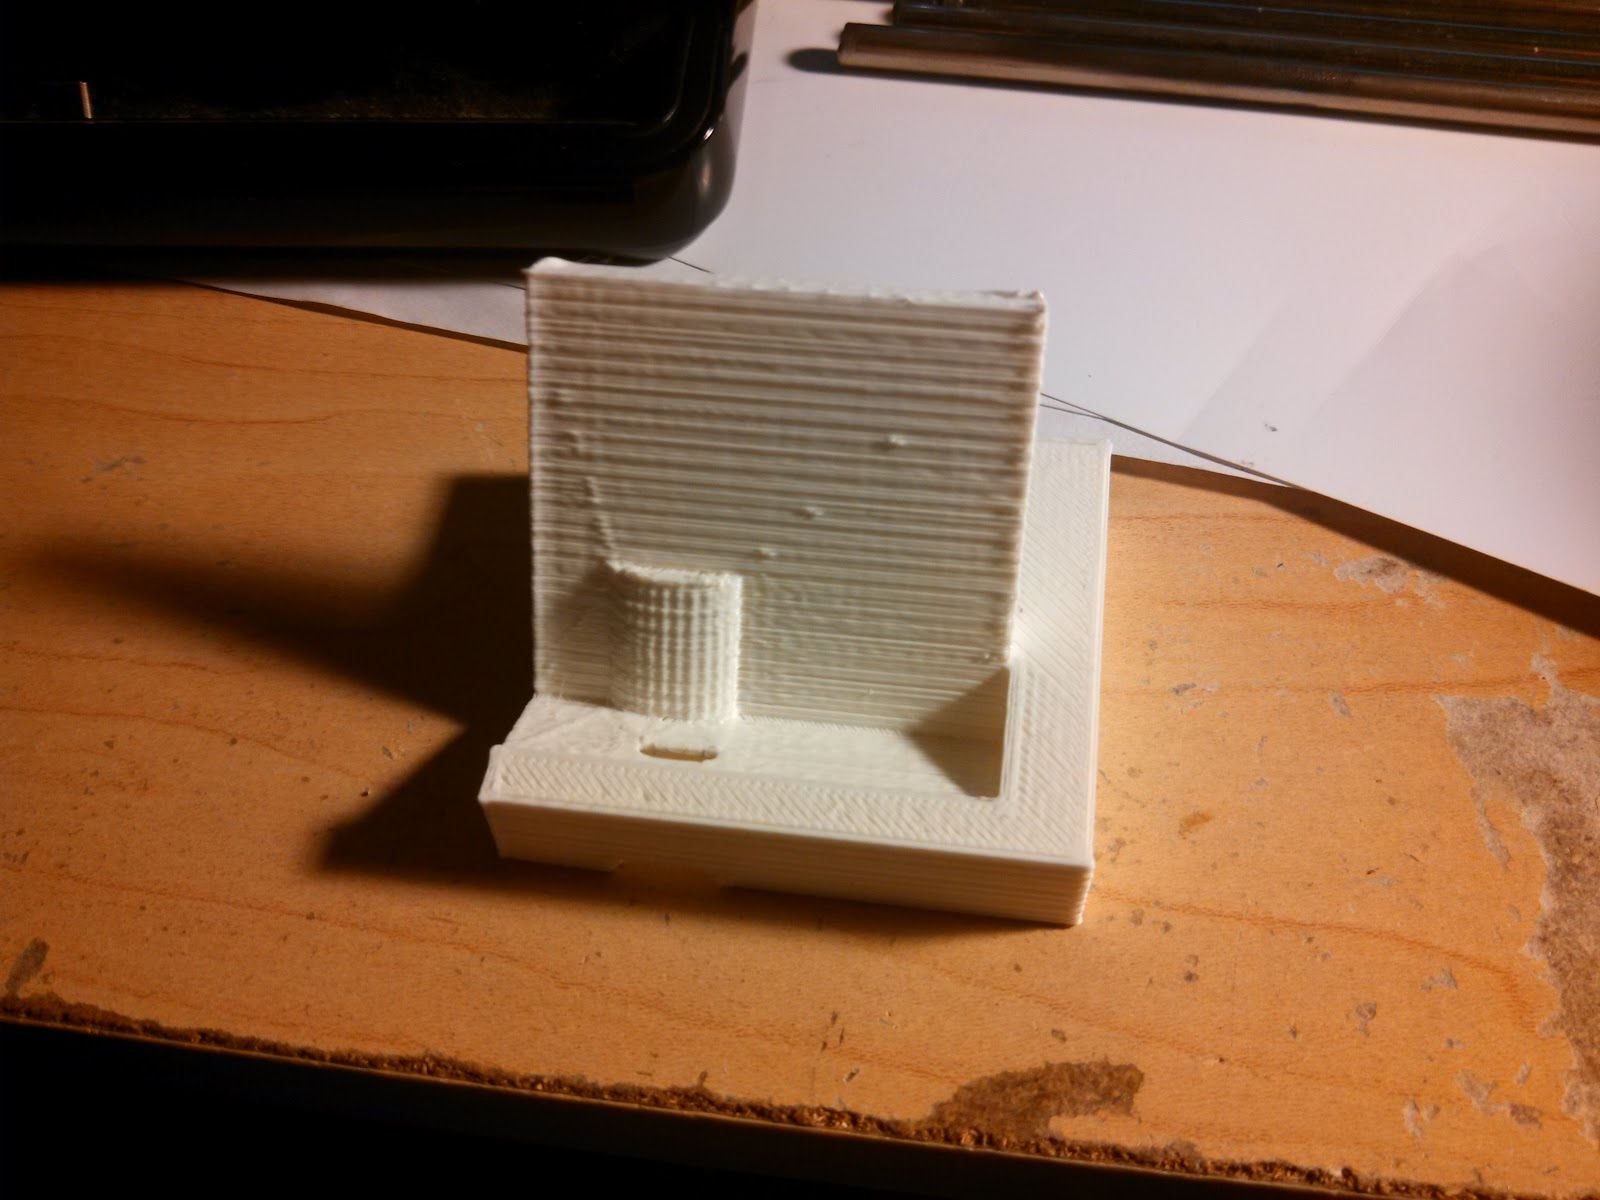
Once the micro USB slot was verified, I polished the design - for example, by adding this cable strain relief slot to the base.
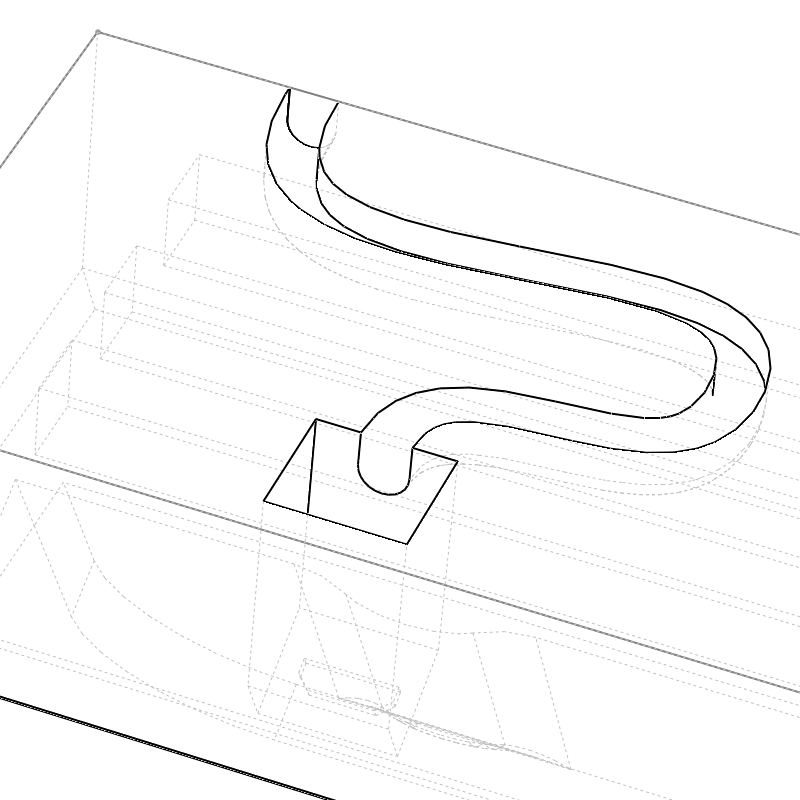
There are three 130mm long x 6.35mm square spaces internal to the base to allow weight to be added mid-print.
I was pretty worried about this working correctly - I had never designed or printed anything that must be paused mid-print. Other than being fairly inconvenient, it worked out great.
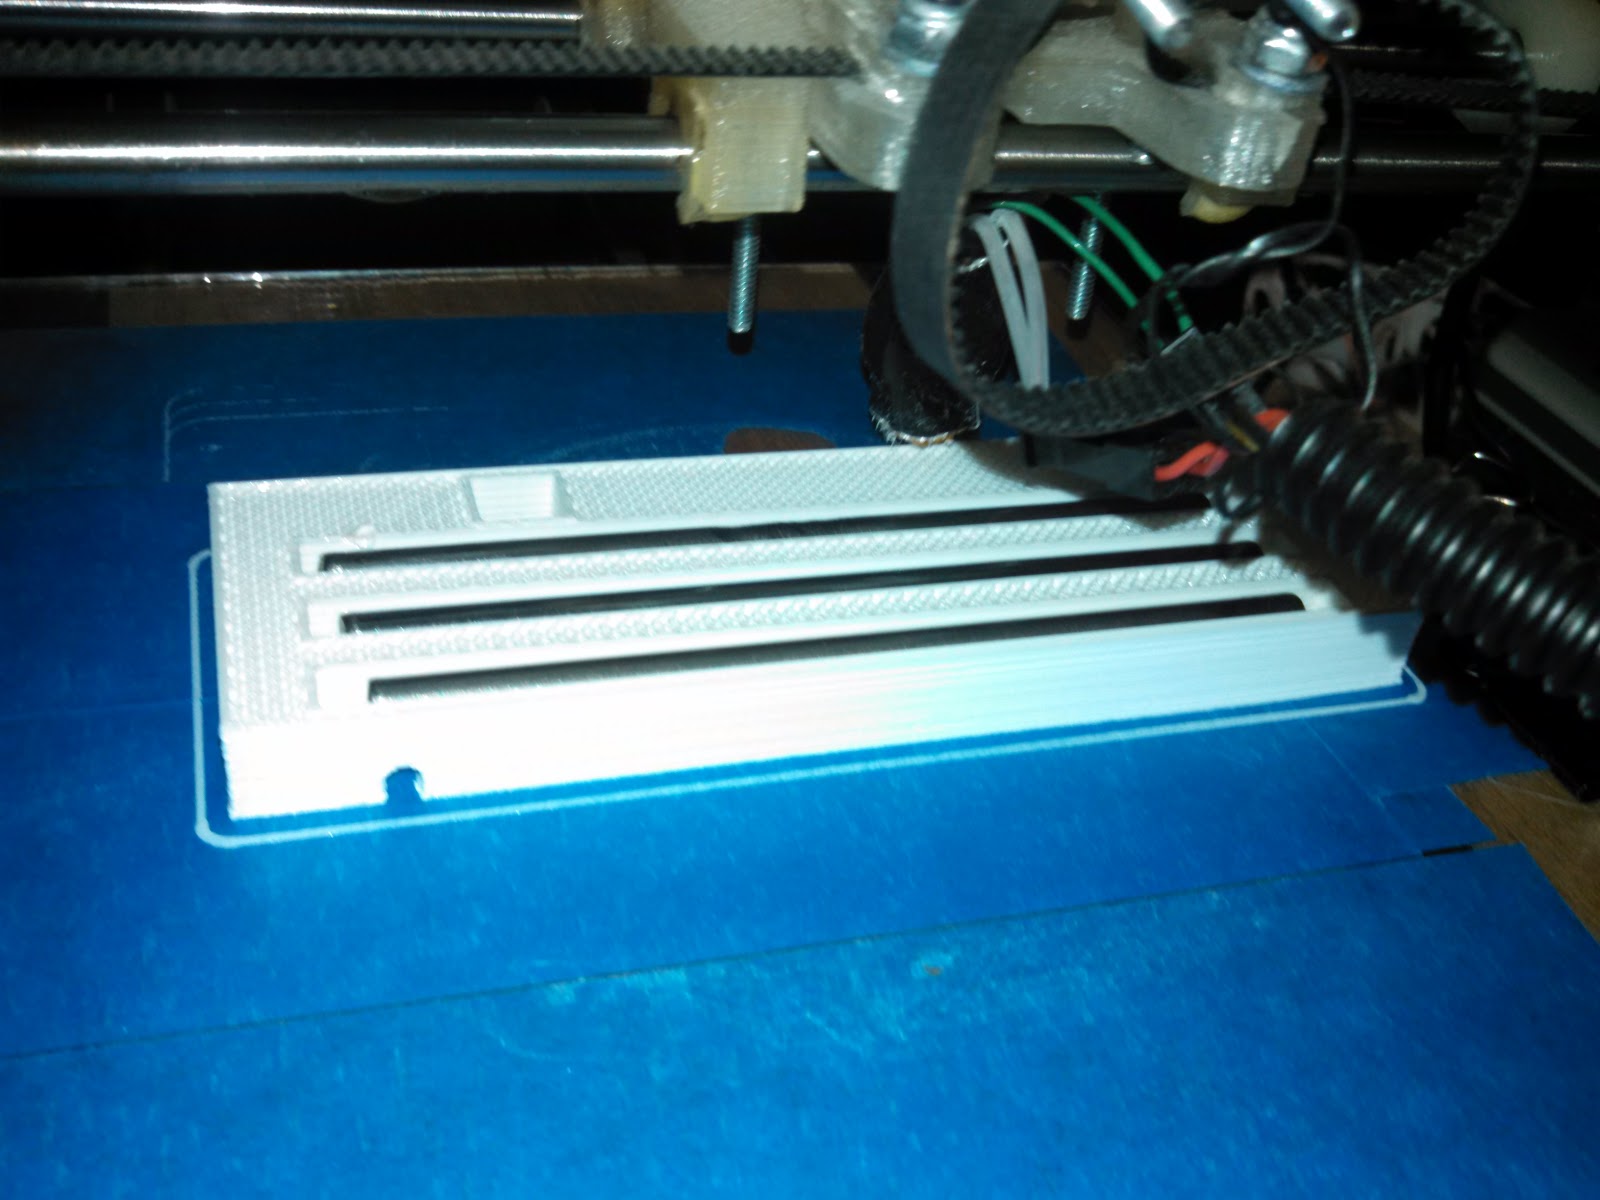
I am very happy with how the dock turned out. It's well weighted and everything fits. I am holding off on final assembly (gluing the USB connector in place) until I discover the proper resistor value to put this phone into dock mode. I plan to use a fancy resistor box at work to accomplish this - I should have it done within the week.
Generic Maker
Written by George Hahn
george@genericmaker.com
